Showing posts with label garden fresh. Show all posts

Saturday, January 31, 2015

Asian Chicken Salad

I have been loving this salad recently. I like to add some chicken to it, but you could certainly skip the chicken and it would still be filling and tasty.
Click here for the printable version.
 You'll need: melted peanut butter (not pictured), rice vinegar, soy sauce, vegetable oil, sugar, roasted almonds, sesame seeds, chow mein noodles, napa cabbage, romaine lettuce, carrots, basil, sweet sweet peppers.
Whisk together 1/4 C veg oil, 2 T soy sauce, 2 T rice vinegar, 1/2 tsp sugar, and 1 1/2 T melted peanut butter to make the dressing.
 Thinly slice the napa cabbage.
 Thinly slice the romaine lettuce.
 Use a vegetable peeler to shave the carrots.
 Slice the peppers and basil and mix with the cabbage, lettuce, carrots, sesame seeds. Don't forget the almonds and chicken like I almost did when taking these pictures.
 Add prepared dressing to the salad and toss thoroughly.
Top the salad with chow mein noodles and, if desired, mandarin oranges. Enjoy!

Click here for the printable version


What's your favorite salad?

Monday, December 8, 2014

Carmelized Brussel Sprouts

This is my hands-down favorite way to prepare and eat brussel sprouts. This method is quick, easy, and is enjoyed by everyone I've made them for.
You'll need:
1 1/2 lb brussel sprouts
3 TBSP extra virgin olive oil
1 tsp kosher salt
1/2 tsp sugar

Preheat oven with baking sheet on bottom rack to 500 F
Meanwhile trim the bottoms of each sprout and remove any undesirable leaves, then cut in half.
Drizzle sprouts with oil in a large bowl, then toss to evenly coat.
Sprinkle with salt and sugar and toss gently to combine.
Transfer sprouts to preheated baking sheet and spread evenly. For best results, turn sprouts flat side down.
Roast in oven til browned and tender about 12 minutes, turning halfway for even browning.

Serve and enjoy immediately (they cool down quickly).

Thursday, September 25, 2014

Firehouse Spinach Meatloaf

David was at our local Station 1 Firehouse shortly before dinner one day and they were making spinach meatloaf. He came home excited and wanted me to recreate it, so on my second attempt I came up with this recipe.
You'll need: ground turkey (or beef), spinach, diced onion, grated Parmesan, oats, eggs, and garlic.
Blend everything except the meat until mostly smooth.
Add meat and blend some more. You'll need a 9 cup or larger blender or you'll want to separate into smaller batches.
Bake for an hour and a half at 350 F and don't be surprised when it comes out looking kind of ugly. It tastes much better than it looks. Ketchup isn't required, but does compliment it nicely when serving.
Click here for the printer friendly version.

How do you eat your spinach?

Friday, August 22, 2014

Harvesting Onions and Carrots 2014

One thing I loved about my garden this year was having onions and carrots at the ready for anything I needed. We had a big problem with weeds this year, so we were forced to pick everything a little early. Even so, we did pretty well. This was my first year for onions and my second for carrots.
 I wanted to leave the onions in longer, because some of them aren't very big, but I don't think they would've made it.
 Onions need to be cured for long-term storage. Basically you just let them dry out a to develop the outer layer, and then you can store them like you would onions from the grocery store. For more details check out this post from Common Sense Homesteading.
Our carrots were all good sizes, but some of them sure do look funny.

 Since we didn't grow enough carrots to last us all year, we just washed them off with the hose, trimmed the greens, and tossed them in the fridge.
All the sources I've read, say that if you want to store them long term, you should do it in a bucket or tote of moist sand. For more details on storing carrots and other vegetables for winter, check out this post from The 104 Homestead.

What do you (or would you) do with fresh onions or carrots from your garden?

Saturday, August 16, 2014

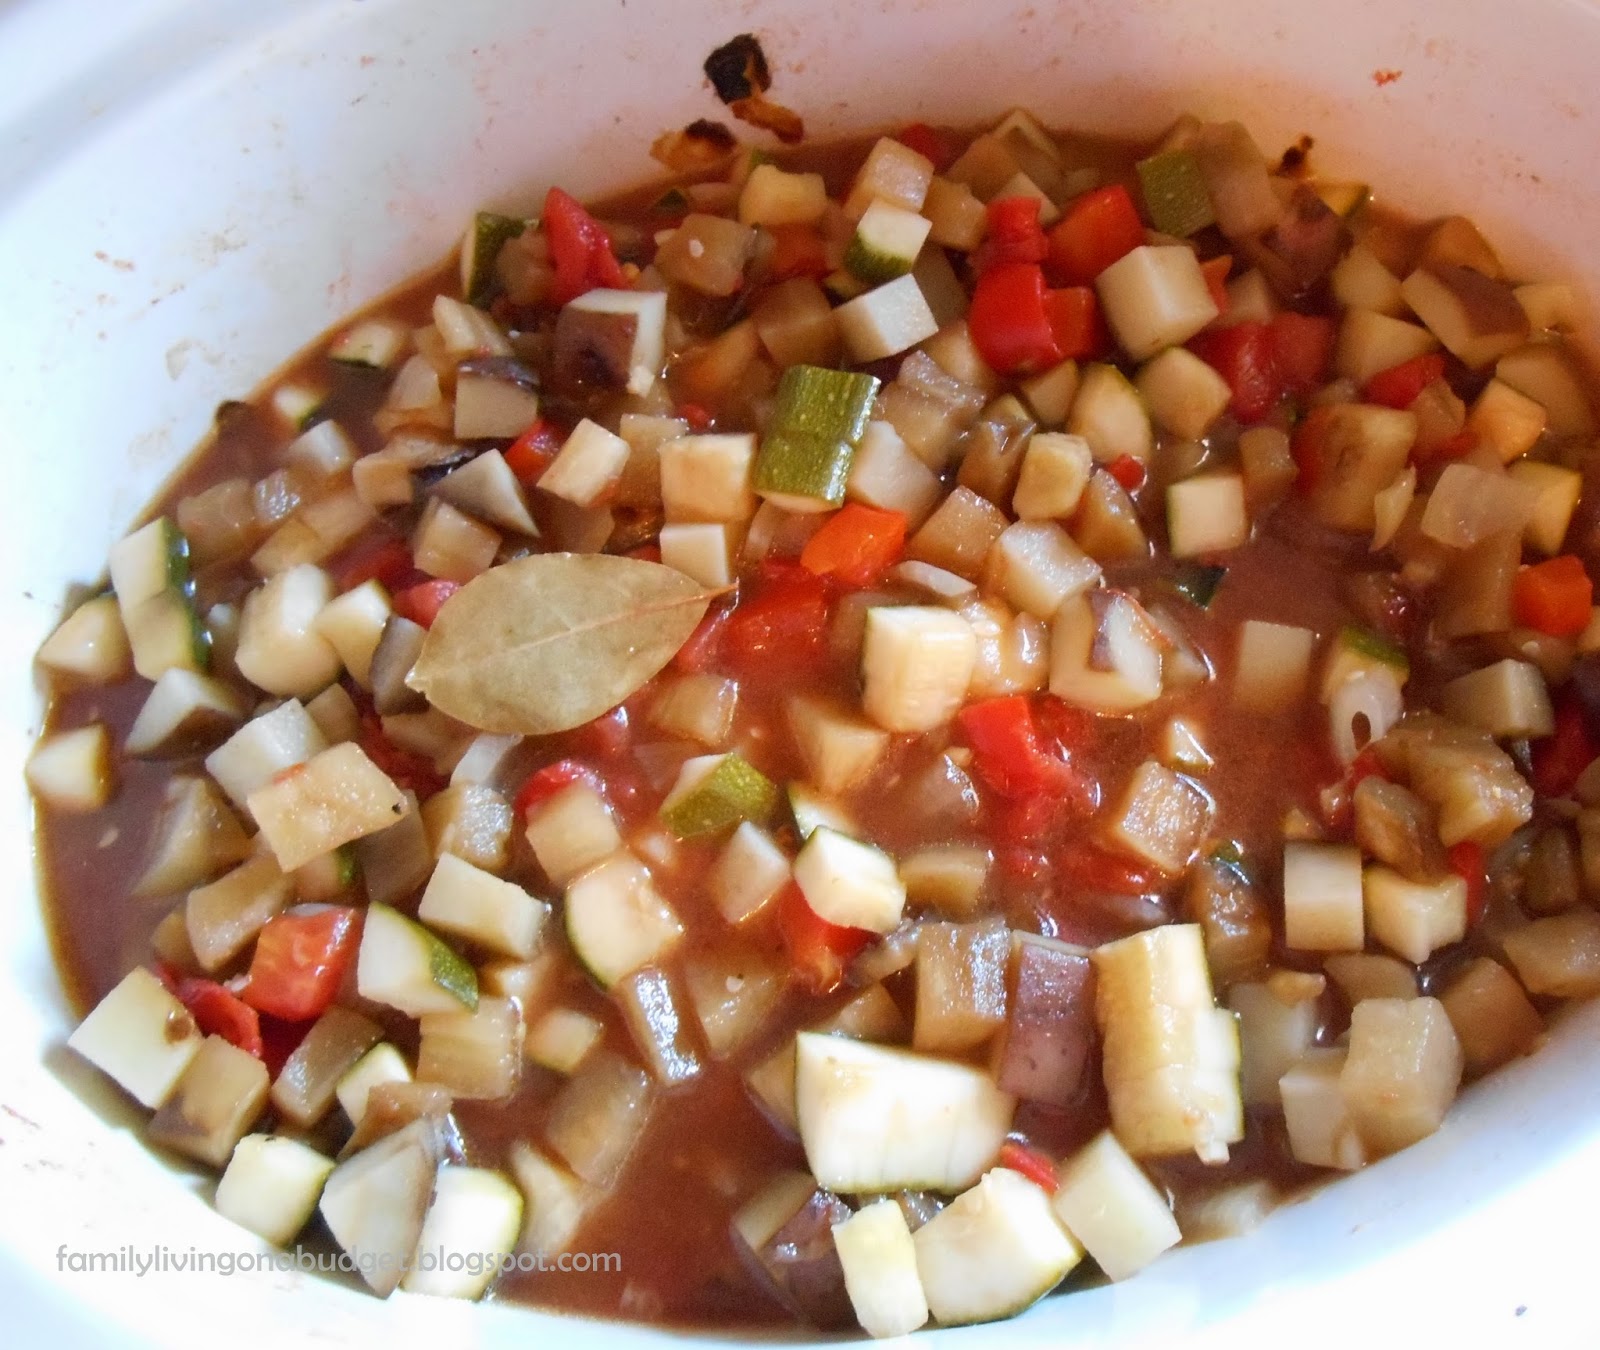
Summer Vegetable Stew in a slow cooker

I first started making this recipe in college. I was running on the treadmill while watching Food Network and Rachel Ray came on with a total drool worthy Giambotta. I watched the show and then tweaked it to my preferences. One of my room mates was not a very adventurous eater, but absolutely loved this recipe. Back then, I made it in a stock pot, but when I started having kids, I no longer had time to stand in the kitchen for an hour or more supervising a pot.
The cooking times for this recipe will yield al dente vegetables, if you prefer yours softer, cook on high instead of low or increase cooking time.

You'll need:
1 T olive oil
2 cloves garlic, minced
1 bay leaf
2 onions, diced
2 medium-large red potatoes
1 large eggplant
2 medium zucchini
1 red bell pepper
14.5 oz diced tomatoes
2 C stock*, chicken or vegetable (if you want it vegan)
1 tsp sea salt (or to taste)
pinch of pepper (or to taste)

Turn slow cooker on high and place oil, garlic, bay leaf, and onions on bottom.

Chop potatoes and add to slow cooker.
Peel and chop eggplant and add to slow cooker.
Chop zucchini and add to slow cooker.
Remove seeds from pepper, chop, and add to slow cooker.
Do NOT stir.
Reduce heat to low and cook 4 hours.
Stir in the tomatoes and stock.
Continue to cook 1-2 hours or until ready to eat
If you're not ready to eat yet within a few hours, turn the slow cooker to warm.

Serve with a crusty bread.
Enjoy!

*If you're using vegetable stock, make sure it is a flavorful, high quality stock or your stew will require additional seasoning. Most chicken stocks will taste great.

Printer friendly version

That wraps up Zucchini week (I ran out of zucchini). For links to the other recipes, check out this week's meal plan here.
This recipe originally appeared on 8/3/12 @ oneincomefamilyliving.blogspot.com. I wrote, edited, and transferred it here.

Baked Ratatouille

 This is not a traditional ratatouille. I was inspired to make this from one of our family favorite movies, but it's really more of a cross between a vegetable tian and ratatouille. I go ahead and call it Ratatouille, because it looks like the dish from the movie and it's close enough.


Ingredients:
1-2 red skinned potatoes
1 medium eggplant, peeled
1 medium zucchini squash
1 medium yellow summer squash
2 C tomato based sauce (whatever your favorite is, but I usually go for one with peppers and garlic)
1/4 tsp thyme
1/2 tsp sea salt
1/8 tsp pepper
grated Parmesan cheese for garnish (optional)

Preheat oven to 400 F
Thinly slice potato, eggplant, and zucchinis (you'll want approximately the same number of slices for each and they should be about the same thickness- a mandolin slicer works well for this)
Spread the sauce on the bottom of your baking dish.
Place alternating slices in baking dish, sprinkle with spices, and cover with parchment paper.
Bake 45- 60 minutes until potato slices are cooked through.
Serve with Parmesan cheese if desired.
Enjoy!

Handy Hints:
This works best with long narrow vegetables, but, I make do with whatever is available.
To prevent browning, put the slices of potato and eggplant into a bowl of cold water until they go in the baking dish.

Have you been inspired to create something after watching a movie?

Wednesday, August 13, 2014

Zucchini Meatloaf

Zucchini week continues with this amazingly delicious meatloaf that I spent 2 summers perfecting. Did you know that you can freeze zucchini? Simply shred it and stick it in a freezer bag for later. This recipe works great with the frozen stuff, though you do need to thaw it first.
This zucchini meatloaf recipe is delicious. It keeps it's loaf shape, but is extremely moist and easily eaten by even the littlest of meat eaters. (Wyatt was eating this before his first birthday). It's also healthy enough to please me, while still being traditional enough to please my husband (and have him tell me to make it more often). This meatloaf is easy to make and will have you anxiously awaiting dinner once the aroma fills the room about half way through it's cooking time.

Ingredients:
1 1/2 lb ground beef or turkey
2 eggs
3/4 C quick oats
3/4 C shredded zucchini
1/3 C* + 1/4 C ketchup, divided
8 tsp dried minced onion
4 tsp beef bouillon (4 cubes crushed)
1 tsp onion powder
1/4 tsp pepper


Preheat oven to 350 F
Grease a standard loaf pan and set aside.
Mix beef, eggs, oats, zucchini, 1/3C ketchup*, dried onion, bouillon, onion powder, and pepper together in a large bowl until well incorporated.
Pack the mixture into the prepared loaf pan.
Spread the remaining 1/4 C ketchup on top.
Bake for 1 hour** or until cooked through (may take an extra15-20 minutes).
Allow to cool 5-10 minutes.
Enjoy!


*the 1/3 ketchup in the meatloaf mixture can be substituted either partially or entirely for tomato sauce.
**if you need to speed things along a bit, bump up the temperature to 400 anytime after the 30 minute mark.


This recipe originally appeared on 8/21/13 @oneincomefamilyliving.blogspot.com. I wrote and transferred it here.

Don't forget to check back all week as I share more of my favorite zucchini recipes!

Do you freeze zucchini?

Tuesday, August 12, 2014

Zucchini Stuffing Muffins and Tasty Tuesday Link-up

I don't know about you, but I love a good stuffing. I rarely make stuffing, because well, it's really just bread and I can certainly eat enough of that without having to do the extra work or get the extra calories.
These little muffins are not really stuffing, but they taste just like it and will make you want to keep eating. The best part is they are primarily zucchini, so not only can you use the produce from your garden, but you can feel ok about eating the entire recipe...which I have not done...I share, like a nice mom and wife.
Yield: 24+ mini muffins, about 6 servings (or 1 really big one)
You'll need this stuff:
1 C shredded zucchini
1 small onion, diced
2 eggs (I realize only one is pictured, sorry)
1/2 C cheddar cheese
1/2 C Italian bread crumbs
1/4 tsp each salt and pepper

Preheat oven to 400 F. Grease a min muffin tin and set aside.
Squeeze the excess moisture from zucchini. (use paper towels, a small strainer, or your bare hands)
Combine all the ingredients.
Pack the mixture into the muffin cups
Bake 18-20 minutes, until golden brown.
Remove from tins and enjoy.


This is a great recipe to let the kids help with. Zeke loved stirring the mixture and spooning it into the muffin tins.


This month, Tammy from Creative K Kids, Dina from My UN-Entitled Life, and I are running this party on our blogs!    

We would love to have you link up to three of your old or new food posts!   Here are  just a few requests for this linky:cohost for August
  • PLEASE follow the hosts and co-hosts of this party through one of their social media listed below.  They visit your post, leave a comment, and pin your post.  Just pick one (or more) of the options below and please follow them.
**Tammy at Creative K Kids (Blog)**
Pinterest/Facebook/Google+/Twitter/Instagram
**Dina at My UN-Entitled Life  (Blog)** 
Pinterest/Facebook/Google+/Twitter/Instagram
**Anna at Family Living on a Budget (Blog)**
Pinterest/Facebook/Google+/Twitter/Instagram
  • Try to visit a couple of blogs and leave a comment or share their posts.
  • Please make sure you link up only food-related posts that have never been linked up here before or they will be deleted.  Non-food posts can always be linked up to the Bloggers Brags Pinterest Party!
  • Place this button or a link to this post somewhere on your site--either on the actual post or on your sidebar or on your party page.

  • As a thank-you for linking up, we will pin your recipe to the Tasty Tuesdays at Creative K Kids Pinterest board.  Please follow the board to see all the great food recipes!  
  • By linking up, you agree to let any of the hosts or co-hosts  use your pictures and links if they decide to feature your post.   Your photo may also be used for promotion on any of their social media outlets.
  • If you include your e-mail in the linky form below you will be added to a weekly reminder e-mail when the link party goes live. Your e-mail will not to added to any other lists or given out.

Monday, August 11, 2014

Meal Plan Monday: Zucchini week

Welcome to Family Living on a Budget's Meal Plan Monday. Join me every Monday for a new and affordable menu. Most weeks they are Dinner plans, but I also throw in other meal plans periodically too. I have 4 kids, ages 5 and under, so you'll find my lists to be relatively kid friendly.
Zucchini is abundant right now, well, not so much in my garden as at the store, so I'm taking advantage and pulling out some of my favorite zucchini recipes, which I'll be sharing actual recipes for this week (I need fresh pictures to complete the posts). My family will not actually be eating all 7 of these plans this week, because we'll have leftovers. I have the ingredients for each though and will decide throughout the week which one or two gets left out and/or moved to next week.
Cheesy Garlic Zucchini Bread from Common Sense Homesteading
And zucchini week wouldn't be complete without some extra zucchini treat options:
What's your favorite zucchini recipe? 
This post is linked up to menu plan Monday

Photos used with permission from respective authors/photographers.

Friday, August 8, 2014

Growing Green Beans: what I've learned so far

I love green beans! I eat them year round, but nothing compares to the fresh taste and satisfaction I get from my garden green beans. This is my third year growing them and I've tried them 3 different ways.
The first year, I grew several bushes. My harvest was fairly small and I was about 9 months pregnant so bending over to pick the beans was not the most comfortable thing.
Last year, I planted pole beans with our corn. I must have done something wrong though, because the beans choked out the corn. The beans still did well, but I didn't get any corn.
This year, I tried pole beans again and made bean teepees. I know pole beans can grow pretty tall, but David only found 6 ft poles for me, so that's what we used. The following picture was taken just after I planted everything a little less than 3 months ago.
 The next picture was taken last night.
 As you can see, they look rather top heavy. Part of that is because the chickens kept sitting on and eating the plants when they were new and they still like to munch on the lower parts. The main reason for the top heaviness is because the teepees are a few feet too short! My longest vine is at least 8 if not 9 feet in length.
I do have lots of green beans ready to be harvested and many more that will be ready sometime this next week, so I'll be adding to garden fresh green beans to next week's meal plan.


Have you ever grown green beans? If so, what kind and how did it go? If not, do you think you'll ever give it a try?


Tuesday, August 5, 2014

Creole Chicken and Tasty Tuesday Link-Up

I've got a treat for you all today. Not only do I have a fast and fresh recipe for you, but I'm also co-hosting the Tasty Tuesday link-up!
First things first: This recipe actually comes from my mom. It's one of her go-to recipes and I love it! Unfortunately, David isn't too fond of peppers or cooked tomato chunks, so I rarely make this dish at my house. This is a great recipe for stretching your budget, it uses things I usually have on hand. However, I realize not everyone always has creole seasoning.
 Warning: Creole seasoning is spicy, so don't use too much. If it's too spicy add a little sugar to tone it down a little.
Edited to add: The amount I have specified gives it a kick, but in my opinion is a family friendly spicy, if you like things really spicy, I'd add a bit more.
Serves: 4-6

1 1/2 C boneless/skinless chicken, chopped   
2 stalks celery, chopped  
2 C sweet pepper, chopped   
1/2 onion, chopped
1 (14 oz) can diced tomatoes 
1 ½ tsp Creole seasoning (or to taste)   
1 TBSP lemon juice   
3 C rice, prepared   

Cook chicken in a large skillet over medium heat 4-5 minutes.
Add chicken, celery, pepper, and onion and sauté for about 5 minutes.
Add tomatoes, seasoning, and lemon juice. Simmer 10 minutes.
Serve over rice.

Enjoy!

Ideas to save you money on this recipe:
Canned tomatoes can get pretty expensive at most grocery stores, so when I need more and can't find a sale, I go to Aldi where they are usually cheap enough. They used to be $.55, but are now $.59.
Use leftover meat from another meal, or buy bone-in chicken and de-bone it yourself.
The pepper and celery can be purchased in frozen bags for $1 (or you can freeze them yourself when you find a great deal).

This month, Tammy from Creative K Kids, Dina from My UN-Entitled Life, and I are running this party on our blogs!    

We would love to have you link up to three of your old or new food posts!   Here are  just a few requests for this linky:cohost for August
  • PLEASE follow the hosts and co-hosts of this party through one of their social media listed below.  They visit your post, leave a comment, and pin your post.  Just pick one (or more) of the options below and please follow them.
**Tammy at Creative K Kids (Blog)**
Pinterest/Facebook/Google+/Twitter/Instagram
**Dina at My UN-Entitled Life  (Blog)** 
Pinterest/Facebook/Google+/Twitter/Instagram
**Anna at Family Living on a Budget (Blog)**
Pinterest/Facebook/Google+/Twitter/Instagram
  • Try to visit a couple of blogs and leave a comment or share their posts.
  • Please make sure you link up only food-related posts that have never been linked up here before or they will be deleted.  Non-food posts can always be linked up to the Bloggers Brags Pinterest Party!
  • Place this button or a link to this post somewhere on your site--either on the actual post or on your sidebar or on your party page.

  • As a thank-you for linking up, we will pin your recipe to the Tasty Tuesdays at Creative K Kids Pinterest board.  Please follow the board to see all the great food recipes!  
  • By linking up, you agree to let any of the hosts or co-hosts  use your pictures and links if they decide to feature your post.   Your photo may also be used for promotion on any of their social media outlets.
  • If you include your e-mail in the linky form below you will be added to a weekly reminder e-mail when the link party goes live. Your e-mail will not to added to any other lists or given out.

Friday, August 1, 2014

How to Freeze Berries

This week's homestead post is all about berries. Blueberries have been on sale recently and the other day a lady asked if she could freeze them. Honestly, she wasn't talking to me, she was just thinking out loud, but I answered her all the same and told her I did it all the time. I then went on to give her the instructions I'm about to share here. Then I purchased some for my freezer to use in muffins and pancakes this winter, so I thought I'd share the process with you here.

Before you freeze them, you'll want to wash them. To clean berries, I like to use a salad spinner. It makes it a cinch to dry them without squishing or waterlogging them. Dry your berries as thoroughly as possible before freezing.
 Spread an even layer of berries on a pan to flash freeze. I usually leave the berries in the freezer for 2-4 hours.
Transfer the berries to a freezer bag, seal, and place back it the freezer. If you keep air out and don't let it thaw, the berries will keep in the freezer all winter long.

What is your favorite type of berry and how do you like to eat it?
Related Posts Plugin for WordPress, Blogger...