My kids love pancakes! They will eat just about any pancake I throw in front of them. I, on the other hand am a little more picky. I have this theory that a great pancake doesn't need syrup. I have also been convinced for quite some time that a great pancake recipe can use either refined flour or whole wheat flour. This recipe does just that. We have enjoyed it numerous ways, I prefer the whole wheat or at least a mix, but admittedly David still prefers the refined flour. He douses it in syrup anyway, so who cares what he thinks, right? ...Actually I do, so that's why I compromised and am sharing this recipe with half of each.
This recipe yields about 24 medium pancakes. Click here for the printer friendly version.
Melt 6 T butter and whisk together with 3 C milk and 2 eggs.
If you don't whisk the ingredients fast enough, you might get little clumps of butter that are solidified after touching the cold milk. This isn't a big deal.
Whisk together 1 1/2 C each whole white wheat and all-purpose flours, 7 tsp baking powder, 2 tsp salt, and 2 T sugar.
Whisk together the wet and dry mixes until incorporated and the batter begins to bubble (it won't take long). Allow batter to rest while you preheat your griddle.
Grease the griddle and pour about 1/4 C batter onto the preheated griddle. Allow to set until edges are slightly firm and the centers have bubbles. (The above pancakes are all ready to flip.)
Enjoy!
Click here for the printer friendly version.
How do you like to top your pancakes?
Showing posts with label freezable. Show all posts
Friday, February 6, 2015
Thursday, October 16, 2014
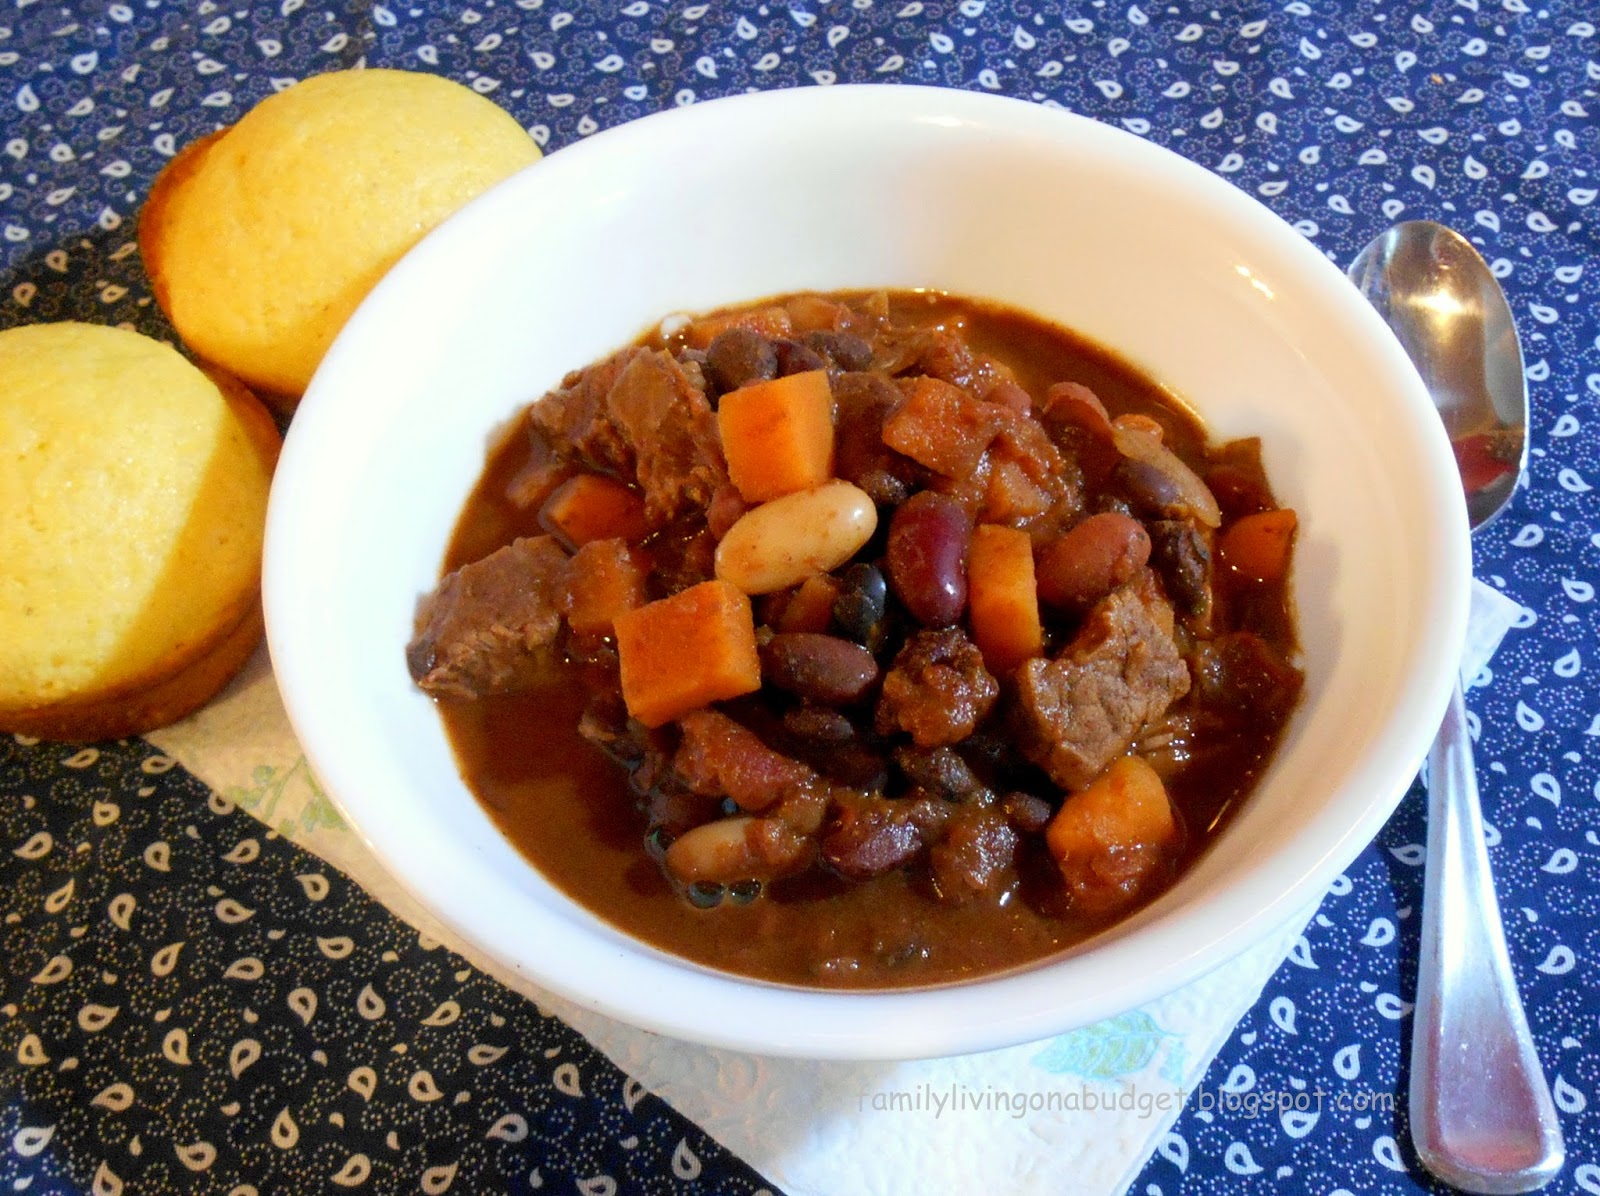
Sweet Potato Chili
This is probably my favorite chili recipe and I'm pretty sure it's Wyatt's too. I can pretty much always count on him to ask for seconds and thirds when I make this yummy goodness. This is also one of the two ways I can get David to happily eat sweet potato and this version is certainly healthier than the sweet potato casserole I make .
This recipe is perfect for those days you will be gone all day and want a hot and tasty meal ready as soon as you get home. I usually cook this 8-10 hours, but it could cook for 12 without getting overcooked.
Serves about 10 with roughly 302 Calories and 11 g dietary fiber per serving.
Printer friendly version
You'll need: 2 tsp chili powder, 2-3 TBSP baking cocoa, 1/2 tsp nutmeg, 2 cans chili style tomatoes, 1 can chili beans, 1 can black beans, 1 can dark red kidney beans, 1 can cannellini beans, 1 lb sweet potato, 1 onion, 1 tsp oregano, 1.25 lb stewing beef
Turn slow cooker on low. Peel and dice the sweet potato and onion. Place in the slow cooker with the beef chunks.
Add the chili beans and tomatoes with their juices.
Drain and rinse the cannelini, black, and kidney beans before adding them to the slow cooker.
Add the spices...
...and stir together. It won't look like it has enough liquid, but it has plenty. Cover the slow cooker and leave it alone for at least 8 hours
When it's ready, the sweet potato will be tender, the meat will be cooked, and the liquid will have more of a brown color than red.
Printer friendly version
What's your favorite way to eat sweet potatoes?
This recipe is perfect for those days you will be gone all day and want a hot and tasty meal ready as soon as you get home. I usually cook this 8-10 hours, but it could cook for 12 without getting overcooked.
Serves about 10 with roughly 302 Calories and 11 g dietary fiber per serving.
Printer friendly version
You'll need: 2 tsp chili powder, 2-3 TBSP baking cocoa, 1/2 tsp nutmeg, 2 cans chili style tomatoes, 1 can chili beans, 1 can black beans, 1 can dark red kidney beans, 1 can cannellini beans, 1 lb sweet potato, 1 onion, 1 tsp oregano, 1.25 lb stewing beef
Turn slow cooker on low. Peel and dice the sweet potato and onion. Place in the slow cooker with the beef chunks.
Add the chili beans and tomatoes with their juices.
Drain and rinse the cannelini, black, and kidney beans before adding them to the slow cooker.
Add the spices...
...and stir together. It won't look like it has enough liquid, but it has plenty. Cover the slow cooker and leave it alone for at least 8 hours
When it's ready, the sweet potato will be tender, the meat will be cooked, and the liquid will have more of a brown color than red.
Printer friendly version
What's your favorite way to eat sweet potatoes?
Wednesday, August 27, 2014
100% Whole Wheat Banana Muffins
Today is Zeke's first day of Kindergarten, so to get him off to a good start, I made these Whole Wheat Banana Muffins. These are a favorite around our house and a batch never lasts long. Usually I make these and we eat them fresh, but occasionally, I make them the night before so that the outside of the muffin gets a nice crisp crust. They also freeze well.
My kids prefer them plain, but David prefers to add in a chopped walnuts, so I've added that as an optional ingredient in the printer friendly version.
You'll need: salt, white wheat flour, baking powder, baking soda, sugar, melted butter, over-ripe bananas, and an egg. A note on the butter: I don't normally say recipes require a certain brand, but I have noticed a superior flavor when I use Land-o-Lakes unsalted butter as opposed to store brand unsalted butter. The ingredient lists are the same, so I never thought about it, but there really is a difference.
Whisk flour, salt, baking powder, and baking soda together in a small bowl. Set aside.
Place bananas in a medium-large mixing bowl. Mash with a fork. It should be super easy, if your bananas are overly ripe.
Add the sugar, egg, and melted butter to the mashed bananas and stir together.
Add dry mix to the wet mix and stir until incorporated (about 50 strokes).
Add 1/4 C batter to each greased muffin tin cup. Use a spoon to evenly distribute any remaining batter. Bake for 23-25 minutes in a 350 F preheated oven.
Whole wheat muffins often come out a bit darker than ones made with all-purpose flour, so don't worry they're not necessarily burnt.
Enjoy!
printer friendly version
Do you like to add extra ingredients into your banana muffins?
My kids prefer them plain, but David prefers to add in a chopped walnuts, so I've added that as an optional ingredient in the printer friendly version.
You'll need: salt, white wheat flour, baking powder, baking soda, sugar, melted butter, over-ripe bananas, and an egg. A note on the butter: I don't normally say recipes require a certain brand, but I have noticed a superior flavor when I use Land-o-Lakes unsalted butter as opposed to store brand unsalted butter. The ingredient lists are the same, so I never thought about it, but there really is a difference.
Whisk flour, salt, baking powder, and baking soda together in a small bowl. Set aside.
Place bananas in a medium-large mixing bowl. Mash with a fork. It should be super easy, if your bananas are overly ripe.
Add the sugar, egg, and melted butter to the mashed bananas and stir together.
Add dry mix to the wet mix and stir until incorporated (about 50 strokes).
Add 1/4 C batter to each greased muffin tin cup. Use a spoon to evenly distribute any remaining batter. Bake for 23-25 minutes in a 350 F preheated oven.
Whole wheat muffins often come out a bit darker than ones made with all-purpose flour, so don't worry they're not necessarily burnt.
Enjoy!
printer friendly version
Do you like to add extra ingredients into your banana muffins?
Tuesday, August 26, 2014
Easy Chicken Pot Pie and Tasty Tuesday Link-up
I love pot pie and this one allows me to have it very quickly. If you're going to make the cream of celery or pie crust yourself, you could make several pies at once and freeze it. The filling also freezes well in a bag on it's own too.
1 box refrigerated pie crust (or make your own)
1 1/2 C chicken or turkey, chunks or shredded
1 (10.5 oz) can cream of celery (or make your own- recipe to come soon)
12 oz frozen vegetable soup mix
Preheat oven to 425 F.
Unroll one sleeve of crust and line the bottom of pie pan.
Mix together chicken, cream of celery, and vegetables in a bowl. Transfer mix to pie pan.
Unroll second crust and place over pie. Trim excess crust and seal edges together. Slit the center of the top crust to vent.
Bake in oven for 40 minutes or until crust is golden brown. If edges start to brown too quickly, place foil strips around them.
Enjoy!
A note on cream of celery: You can buy cream of celery at Aldi's for $0.59 a few months out of the year. If you can't get it this cheap, you could substitute cream of chicken, which you can easily get for $0.50. Or, you can make your own for a mere $0.10 (give or take)- recipe coming soon.
This recipe originally appeared on 11/17/11 @ oneincomefamilyliving.blogspot.com. I wrote it, edited it, and transferred it here.
**Tammy at Creative K Kids (Blog)**
Pinterest/Facebook/Google+/Twitter/Instagram
**Dina at My UN-Entitled Life (Blog)**
Pinterest/Facebook/Google+/Twitter/Instagram
**Anna at Family Living on a Budget (Blog)**
Pinterest/Facebook/Google+/Twitter/Instagram
1 box refrigerated pie crust (or make your own)
1 1/2 C chicken or turkey, chunks or shredded
1 (10.5 oz) can cream of celery (or make your own- recipe to come soon)
12 oz frozen vegetable soup mix
Preheat oven to 425 F.
Unroll one sleeve of crust and line the bottom of pie pan.
Mix together chicken, cream of celery, and vegetables in a bowl. Transfer mix to pie pan.
Unroll second crust and place over pie. Trim excess crust and seal edges together. Slit the center of the top crust to vent.
Bake in oven for 40 minutes or until crust is golden brown. If edges start to brown too quickly, place foil strips around them.
Enjoy!
A note on cream of celery: You can buy cream of celery at Aldi's for $0.59 a few months out of the year. If you can't get it this cheap, you could substitute cream of chicken, which you can easily get for $0.50. Or, you can make your own for a mere $0.10 (give or take)- recipe coming soon.
This recipe originally appeared on 11/17/11 @ oneincomefamilyliving.blogspot.com. I wrote it, edited it, and transferred it here.
This month, Tammy from Creative K Kids, Dina from My UN-Entitled Life, and I are running this party on our blogs!
We would love to have you link up to three of your old or new food posts!
Here are just a few requests for this linky:
- PLEASE follow the hosts and co-hosts of this party through one of their social media listed below. They visit your post, leave a comment, and pin your post. Just pick one (or more) of the options below and please follow them.
- Try to visit a couple of blogs and leave a comment or share their posts.
- Please make sure you link up only food-related posts that have never been linked up here before or they will be deleted. Non-food posts can always be linked up to the Bloggers Brags Pinterest Party!
- Place this button or a link to this post somewhere on your site--either on the actual post or on your sidebar or on your party page.
- As a thank-you for linking up, we will pin your recipe to the Tasty Tuesdays at Creative K Kids Pinterest board. Please follow the board to see all the great food recipes!
- By linking up, you agree to let any of the hosts or co-hosts use your pictures and links if they decide to feature your post. Your photo may also be used for promotion on any of their social media outlets.
- If you include your e-mail in the linky form below you will be added to a weekly reminder e-mail when the link party goes live. Your e-mail will not to added to any other lists or given out.
Wednesday, August 13, 2014
Zucchini Meatloaf
Zucchini week continues with this amazingly delicious meatloaf that I spent 2 summers perfecting. Did you know that you can freeze zucchini? Simply shred it and stick it in a freezer bag for later. This recipe works great with the frozen stuff, though you do need to thaw it first.
This zucchini meatloaf recipe is delicious. It keeps it's loaf shape, but is extremely moist and easily eaten by even the littlest of meat eaters. (Wyatt was eating this before his first birthday). It's also healthy enough to please me, while still being traditional enough to please my husband (and have him tell me to make it more often). This meatloaf is easy to make and will have you anxiously awaiting dinner once the aroma fills the room about half way through it's cooking time.
Ingredients:
1 1/2 lb ground beef or turkey
2 eggs
3/4 C quick oats
3/4 C shredded zucchini
1/3 C* + 1/4 C ketchup, divided
8 tsp dried minced onion
4 tsp beef bouillon (4 cubes crushed)
1 tsp onion powder
1/4 tsp pepper

Preheat oven to 350 F
Grease a standard loaf pan and set aside.
Mix beef, eggs, oats, zucchini, 1/3C ketchup*, dried onion, bouillon, onion powder, and pepper together in a large bowl until well incorporated.
Pack the mixture into the prepared loaf pan.
Spread the remaining 1/4 C ketchup on top.
Bake for 1 hour** or until cooked through (may take an extra15-20 minutes).
Allow to cool 5-10 minutes.
Enjoy!
*the 1/3 ketchup in the meatloaf mixture can be substituted either partially or entirely for tomato sauce.
**if you need to speed things along a bit, bump up the temperature to 400 anytime after the 30 minute mark.
This recipe originally appeared on 8/21/13 @oneincomefamilyliving.blogspot.com. I wrote and transferred it here.
Don't forget to check back all week as I share more of my favorite zucchini recipes!
Do you freeze zucchini?
This zucchini meatloaf recipe is delicious. It keeps it's loaf shape, but is extremely moist and easily eaten by even the littlest of meat eaters. (Wyatt was eating this before his first birthday). It's also healthy enough to please me, while still being traditional enough to please my husband (and have him tell me to make it more often). This meatloaf is easy to make and will have you anxiously awaiting dinner once the aroma fills the room about half way through it's cooking time.
Ingredients:
1 1/2 lb ground beef or turkey
2 eggs
3/4 C quick oats
3/4 C shredded zucchini
1/3 C* + 1/4 C ketchup, divided
8 tsp dried minced onion
4 tsp beef bouillon (4 cubes crushed)
1 tsp onion powder
1/4 tsp pepper

Preheat oven to 350 F
Grease a standard loaf pan and set aside.
Mix beef, eggs, oats, zucchini, 1/3C ketchup*, dried onion, bouillon, onion powder, and pepper together in a large bowl until well incorporated.
Pack the mixture into the prepared loaf pan.
Spread the remaining 1/4 C ketchup on top.
Bake for 1 hour** or until cooked through (may take an extra15-20 minutes).
Allow to cool 5-10 minutes.
Enjoy!
*the 1/3 ketchup in the meatloaf mixture can be substituted either partially or entirely for tomato sauce.
**if you need to speed things along a bit, bump up the temperature to 400 anytime after the 30 minute mark.
This recipe originally appeared on 8/21/13 @oneincomefamilyliving.blogspot.com. I wrote and transferred it here.
Don't forget to check back all week as I share more of my favorite zucchini recipes!
Do you freeze zucchini?
Tuesday, August 12, 2014
Zucchini Stuffing Muffins and Tasty Tuesday Link-up
I don't know about you, but I love a good stuffing. I rarely make stuffing, because well, it's really just bread and I can certainly eat enough of that without having to do the extra work or get the extra calories.
These little muffins are not really stuffing, but they taste just like it and will make you want to keep eating. The best part is they are primarily zucchini, so not only can you use the produce from your garden, but you can feel ok about eating the entire recipe...which I have not done...I share, like a nice mom and wife.
Yield: 24+ mini muffins, about 6 servings (or 1 really big one)
You'll need this stuff:
1 C shredded zucchini
1 small onion, diced
2 eggs (I realize only one is pictured, sorry)
1/2 C cheddar cheese
1/2 C Italian bread crumbs
1/4 tsp each salt and pepper
Preheat oven to 400 F. Grease a min muffin tin and set aside.
Squeeze the excess moisture from zucchini. (use paper towels, a small strainer, or your bare hands)
Combine all the ingredients.
Pack the mixture into the muffin cups
Bake 18-20 minutes, until golden brown.
Remove from tins and enjoy.
This is a great recipe to let the kids help with. Zeke loved stirring the mixture and spooning it into the muffin tins.
**Tammy at Creative K Kids (Blog)**
Pinterest/Facebook/Google+/Twitter/Instagram
**Dina at My UN-Entitled Life (Blog)**
Pinterest/Facebook/Google+/Twitter/Instagram
**Anna at Family Living on a Budget (Blog)**
Pinterest/Facebook/Google+/Twitter/Instagram
These little muffins are not really stuffing, but they taste just like it and will make you want to keep eating. The best part is they are primarily zucchini, so not only can you use the produce from your garden, but you can feel ok about eating the entire recipe...which I have not done...I share, like a nice mom and wife.
You'll need this stuff:
1 small onion, diced
2 eggs (I realize only one is pictured, sorry)
1/2 C cheddar cheese
1/2 C Italian bread crumbs
1/4 tsp each salt and pepper
Preheat oven to 400 F. Grease a min muffin tin and set aside.
Squeeze the excess moisture from zucchini. (use paper towels, a small strainer, or your bare hands)
Combine all the ingredients.
Pack the mixture into the muffin cups
Bake 18-20 minutes, until golden brown.
Remove from tins and enjoy.
This is a great recipe to let the kids help with. Zeke loved stirring the mixture and spooning it into the muffin tins.
This month, Tammy from Creative K Kids, Dina from My UN-Entitled Life, and I are running this party on our blogs!
We would love to have you link up to three of your old or new food posts!
Here are just a few requests for this linky:
- PLEASE follow the hosts and co-hosts of this party through one of their social media listed below. They visit your post, leave a comment, and pin your post. Just pick one (or more) of the options below and please follow them.
- Try to visit a couple of blogs and leave a comment or share their posts.
- Please make sure you link up only food-related posts that have never been linked up here before or they will be deleted. Non-food posts can always be linked up to the Bloggers Brags Pinterest Party!
- Place this button or a link to this post somewhere on your site--either on the actual post or on your sidebar or on your party page.
- As a thank-you for linking up, we will pin your recipe to the Tasty Tuesdays at Creative K Kids Pinterest board. Please follow the board to see all the great food recipes!
- By linking up, you agree to let any of the hosts or co-hosts use your pictures and links if they decide to feature your post. Your photo may also be used for promotion on any of their social media outlets.
- If you include your e-mail in the linky form below you will be added to a weekly reminder e-mail when the link party goes live. Your e-mail will not to added to any other lists or given out.
Tuesday, July 29, 2014
Whole Wheat Pizza Dough
Today is Quinn's 4th birthday and her favorite dinner is pizza, so we're having this for dinner tonight. I love this crust, because it's so easy, tasty, and healthy.
1 1/2 C lukewarm (105-115 F) water
1 tsp sugar
1 T active dry yeast
1 T olive oil (I've used extra virgin olive oil and regular, and they've both turned out great)
4 C whole white wheat flour (the white is important, the red is heavier)
1 1/2 tsp salt
Dissolve sugar into water. Add yeast. Allow to sit approximately 5 minutes (until foamy).
Use the straight edge of a knife to wipe the excess flour off the top of the measuring cup.
Combine flour and salt together. If you have a stand mixer with a kneading attachment, use it (speed 2 for a kitchen aid).
Stir oil into yeast mixture..
While the mixer is running, add the yeast mixture and allow to mix/knead until thoroughly combined.
It should look something like this.
Transfer dough to a large bowl coated with non-stick cooking spray. Cover with a piece of cling-wrap sprayed with non-stick cooking spray and allow to rise in a warm draft free location for 1 hour or until doubled in size.
Gently squeeze to deflate.
To use:
Lightly dust clean work surface with cornmeal. Tear off piece dough and roll out to desired size and thickness. Place on a pan to top and bake.
Bake on bottom rack of the oven at 450 F for 7-10 minutes depending on your toppings.
For a thicker and/or crispier crust:
Pre-bake the crust for about 5 minutes before topping. Depending on your pan, you may want to flip the crust over after baking and before topping.
Top as desired and bake an addition 5- 10 minutes depending on toppings.
1 1/2 C lukewarm (105-115 F) water
1 tsp sugar
1 T active dry yeast
1 T olive oil (I've used extra virgin olive oil and regular, and they've both turned out great)
4 C whole white wheat flour (the white is important, the red is heavier)
1 1/2 tsp salt
Dissolve sugar into water. Add yeast. Allow to sit approximately 5 minutes (until foamy).
*Tip: When measuring your flour, use a spoon to add the flour to the measuring cup. Fill to overflowing.
Use the straight edge of a knife to wipe the excess flour off the top of the measuring cup.
Combine flour and salt together. If you have a stand mixer with a kneading attachment, use it (speed 2 for a kitchen aid).
Stir oil into yeast mixture..
While the mixer is running, add the yeast mixture and allow to mix/knead until thoroughly combined.
It should look something like this.
Transfer dough to a large bowl coated with non-stick cooking spray. Cover with a piece of cling-wrap sprayed with non-stick cooking spray and allow to rise in a warm draft free location for 1 hour or until doubled in size.
Gently squeeze to deflate.
To use:
Lightly dust clean work surface with cornmeal. Tear off piece dough and roll out to desired size and thickness. Place on a pan to top and bake.
Bake on bottom rack of the oven at 450 F for 7-10 minutes depending on your toppings.
For a thicker and/or crispier crust:
Pre-bake the crust for about 5 minutes before topping. Depending on your pan, you may want to flip the crust over after baking and before topping.
Top as desired and bake an addition 5- 10 minutes depending on toppings.
Freeze it:
If you want to freeze your pizza, bake the crust by itself at 350 F for about 8 minutes. Allow crust to cool, top as desired, flash freeze, wrap up, and place back in freezer until ready to use (proceed with normal baking instructions).
To make breadsticks:
Divide dough into 16 equal portions and shape into sticks. Spread melted butter, garlic, and parmesan cheese over each stick. Allow to rise slightly while oven preheats to 450. Bake 6-10 minutes depending on thickness of breadsticks.
Printer friendly version
What's your favorite pizza topping?
Tuesday, July 8, 2014
Prepping Potatoes for the Freezer
Have you ever had a large bag of potatoes that was going to go bad before you could use it all? I have! I get them when the price is right, but don't always feel like having a ton of potato meals. What better way to save those potatoes than putting them in the freezer?!
The tricky part about freezing potatoes is, they don't freeze well raw. After thawing a raw potato the texture gets mealy and undesirable. However, you don't want to cook them so much that they fall apart when cooking.
Here's what I do:
Dice potatoes and place in a stock pot.
Cover completely with water and bring to a boil.
Allow to boil 2-3 minutes- potatoes should be just barely cooked though.
Drain and rinse with cold water to stop potatoes from cooking further.
Spread out on a lined baking sheet and flash freeze for 2-5 hours.
Remove potatoes from freezer and transfer to labeled freezer bags.
If you have a scale, I recommend dividing them in 32oz (2lb) bags- it's the standard size you'll find at the grocery.
Place bags in freezer and use when you're ready.
Note: I leave the skins on, but you can peel them before dicing if you prefer.
What's your favorite way to use frozen diced potatoes?
This post was originally published on 12/30/11 @ oneincomefamilyliving.blogspot.com. I wrote, revised, and transferred it here.
The tricky part about freezing potatoes is, they don't freeze well raw. After thawing a raw potato the texture gets mealy and undesirable. However, you don't want to cook them so much that they fall apart when cooking.
Here's what I do:
Dice potatoes and place in a stock pot.
Cover completely with water and bring to a boil.
Allow to boil 2-3 minutes- potatoes should be just barely cooked though.
Drain and rinse with cold water to stop potatoes from cooking further.
Spread out on a lined baking sheet and flash freeze for 2-5 hours.
Remove potatoes from freezer and transfer to labeled freezer bags.
If you have a scale, I recommend dividing them in 32oz (2lb) bags- it's the standard size you'll find at the grocery.
Place bags in freezer and use when you're ready.
Note: I leave the skins on, but you can peel them before dicing if you prefer.
What's your favorite way to use frozen diced potatoes?
This post was originally published on 12/30/11 @ oneincomefamilyliving.blogspot.com. I wrote, revised, and transferred it here.
Subscribe to:
Posts (Atom)