Showing posts with label sweets. Show all posts

Friday, February 27, 2015

Easy Homestyle Donuts

A couple weeks ago, when I posted a picture of these donuts on instagram and my private facebook page, I got multiple requests for the recipe. So naturally, I made them again to share on here.
Unlike a lot of my recipes, these are nowhere near healthy, but healthy eating is all about balance and sometimes it's nice to have a treat.
 Start by heating your oil in a large skillet over medium-low heat. Prepare premade homestyle buttermilk biscuits, by cutting a hole in the middle- this is important to ensure the donut cooks through all the way. You'll need to be very careful with cooking if you don't add the hole.
 Your oil is the proper temperature when a drop of water causes a light sizzle. If it crackles and pops, turn the heat down and wait to add your donuts. Allow for plenty of space when adding the donuts.
 Allow dough to cook to a medium brown (about 1 minute), then turn to cook the other side (about 1 minute more).
 As your donut finishes, the bubbles will get slower, but won't completely stop.
When they are finished cooking, transfer them to a paper towel lined plate to cool for about 30 seconds.
After the donuts have cooled enough to handle, coat the donut in granulated sugar or whatever you prefer.
Enjoy (in moderation).

What's your favorite donut flavor and topping?

Tuesday, December 23, 2014

Merry Christmas plus an Easy Holiday Treat

I love this time of year and am happy to report that I aced my classes this semester. Why I thought that going to school full time and paying attention to my family would be easy, I don't know. Next semester I'm only going half time so that I can spend less time being the crazy lady that is always worrying about the status of her grades.
If finishing up my classes last week wasn't enough, my family decided to move too. We've known about the move for awhile, so it's not like it was last minute. The hardest part about moving was having to give up our animals since they aren't allowed. Fortunately, a family friend close to our new home has a little farm, so we still get to see him when we go over there. The animals have actually been gone since before Thanksgiving and I miss the fresh eggs. The move has gone mostly smooth so far, aside from a little stomach bug that we're currently passing around. 
If you follow me on instagram, you may have seen the pictures of our simple Chritmas craft treat. The treat is super quick and easy.

Christmas Tree Pretzels

Ingredients:
1 part green candy melts
2 parts almond bark
pretzel rods
mini candy coated chocolates

Melt candy melts and almond bark together over a double boiler or in a chocolate melter (affiliate link to the one I have). You can just use one or the other, but i prefer the consistency of the 2 put together
Place pretzel on wax paper covered flat surface.
Drizzle melted candy across the pretzel as desired and decorate with mini candies.
Allow to dry completely -about 15 minutes and enjoy!


Wishing you and yours a healthy and happy holiday!

Friday, October 10, 2014

Sweets: A Food Network Magazine Cookbook Review

I recently had the pleasure to review another awesome Food Network recipe book. I love their books, because I can always count on some really great recipes. Sweet: Our Best Cupcakes, Cookies, Candy and More did not disappoint.

When I first looked through this book, I was almost overwhelmed (in a good way) by all of the gorgeous photos and delicious looking treats. Every single recipe has at least one large photo, so it's easy to browse through quickly and decide what you want. As if that wasn't enough, the contents sections has little photos of each recipe, so you don't even have to remember what it was called to look up its page number.

I love pretty much everything about this book! There are multiple levels of difficulty and convenience throughout. There are recipes that you can buy everything at the store and simply throw it together and there are recipes that you make completely from scratch, but they make even some of the most daunting sounding recipes look a lot easier.

There's even a chapter on 3D cakes. Those of you that have been around for awhile and follow me on instagram, know that I often make 3D cakes for birthdays. This book has instructions for 17 different "fake-out" cakes. When Zeke saw them he went nuts telling me which ones he wanted for his birthday...in March. It's currently a tie between the Cheeseburger Cake and the Pencil Cake.


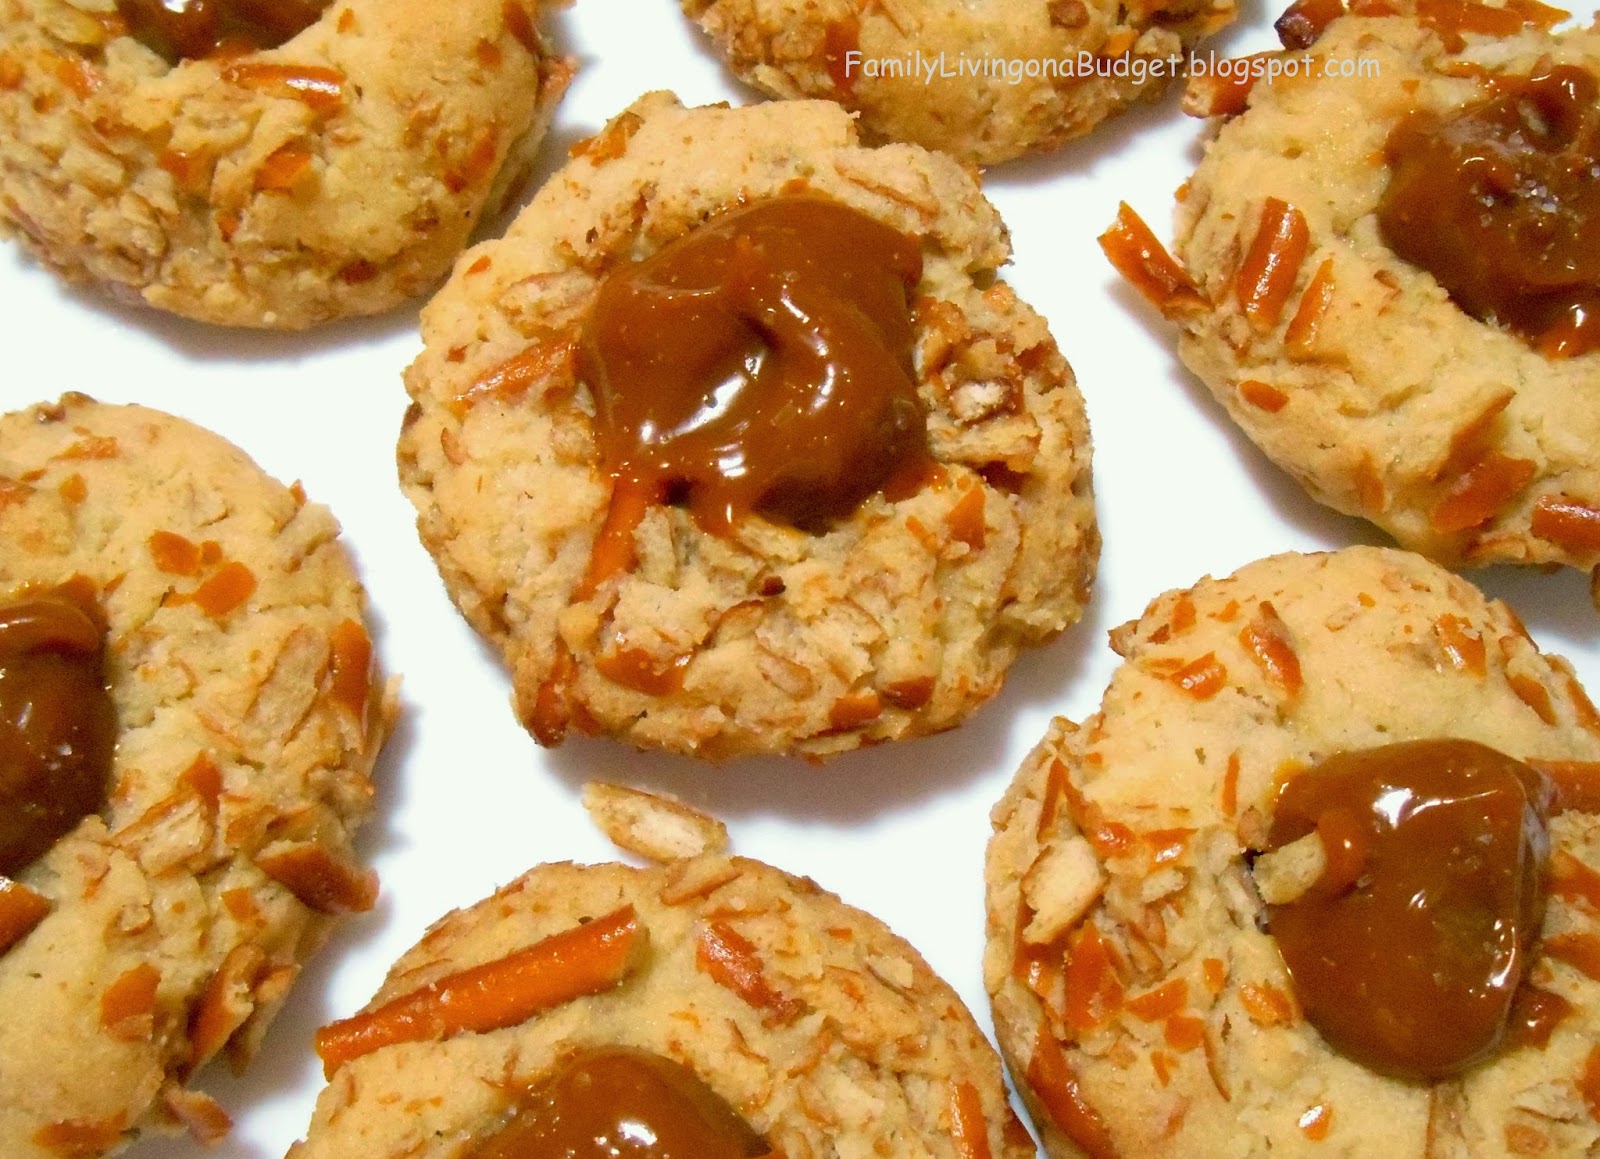
Their other chapters include: Cupcakes & Whoopie Pies, Cookies & Bars, Candy & Snacks, Pies & Crumbles, Show-Off Cakes, Frozen Treats, and Holiday Desserts. For the purpose of this review, I made the Salted Caramel-Pretzel Thumbprints. I made them primarily for a group of friends and their reports were all extremely positive and one woman even suggested I make a batch to take over to her house.


 I received this book from Blogging for Books for this review. All opinions are my own.

If you'd like to order from Random House click here

If you prefer Amazon and would like to use my affiliate link click the following ad:


Tuesday, October 7, 2014

Whole Wheat Pumpkin Pancakes

I love this time of year. The weather allows me to wear pretty much whatever I want, the changing of the leaves is gorgeous, and pumpkin rules the kitchen.
These are easy, delicious, and mostly nutritious, so I like to make these at least once a week for all of October and November.

For a printer friendly version, click here.

 Begin by whisking your dry ingredients together. (2C flour, 2 tsp baking powder, 1 tsp soda, 1 T cinnamon, 1 tsp nutmeg, 1/2 tsp salt)
 Mix your wet ingredients in a separate bowl (1 & 1/3 C pumpkin, 3 T brown sugar, 2 C milk, 1 egg, and 2 T oil). A note on the milk: I've used several varieties of dairy and dairy free milks in this recipe and they all taste great.
 Fold wet and dry ingredients together and allow to rest while you preheat the skillet to 350 F, medium, or whatever setting works best for pancakes at your house.
 Place a scoop of batter on your skillet and allow to cook until edges are set and air bubbles appear on the surface, about 2-3 minutes. Flip and allow to finish cooking another 2-3 minutes.

Enjoy!

Printer Friendly Version

Variation: sprinkle some mini chocolate chips into the batter and top with some chocolate sauce  and whipped cream for a yummy desert.

When do you prefer to eat pumpkin pancakes?

Tuesday, July 15, 2014

Salted Caramel Chocolate Nut Pie

I am currently obsessed with this pie! It's a good thing I made this for company or I probably would've eaten the whole thing myself!


To make this you'll need:
Don't forget the vanilla like I did in this picture.
For the salted caramel: (special thanks to Cookies and Cups for the easy recipe that inspired this pie.)
 Combine 1/4 C melted butter (salted), 1 C light brown sugar, and 1/2 C heavy whipping cream.
 Whisk until smooth.
 Microwave 2 minutes, stir, and microwave 2 minutes more. And be sure to ignore the quality of the pictures taken with my phone after I exhausted the battery on my camera
Whisk in 1/2 tsp each kosher salt and vanilla extract. Set aside.

For the crust:
 Crush 1 sleeve graham crackers into a powder.
 Mix the crushed graham crackers, 1/3 C sugar, and 6 T melted butter. Ah, that's better.
Form around the sides and bottom of the pie pan.

To assemble:
 Pour 3/4 C salted caramel into crust.
Top with 6 T chopped nuts.
Whisk together instant pudding mix and milk for 2 minutes.
Pour on top of nuts. (If you're using the bigger box as shown, you'll have extra, but the little box has just the right amount.)
Refrigerate at least 1 hour.
Top pudding layer with cool whip. You can simply spread it on or get fancy. I used an icing bag with about 1/2 inch cut off the tip and pipped the large dots on the side then filled in the center.
Drizzle on some caramel.
Sprinkle remaining 2 T nuts.
Shave and add some chocolate on top.
Refrigerate until ready to serve and enjoy!

Click here for a printer friendly version.

What's your favorite pie?

Thursday, June 19, 2014

Cheerio Treats

These treats were a huge hit on the old blog and for good reason: they are cute, easy, and delicious. They are not the healthiest treat, so we eat them very sparingly. The first time I ever made these, my kids went nuts. Zeke (2 at the time) stood next to them pointing and rapidly babbling and smiling while Quinn (back then, 1) stood on tippy toes trying her hardest to reach the treats. It really was adorable.
This recipe comes in around $3.50 (give or take depending on sales) and makes about 36 heaping tablespoon sized snacks. That's roughly $.10 per treat!
 Ingredients:
1 C sugar
1 C corn syrup
1 C creamy peanut butter
1 tsp vanilla
5 C cheerios (we prefer the multigrain in the purple box)

In a large pot, bring sugar and corn syrup to a boil. Boil 1 minute.
Remove from heat and stir in peanut butter and vanilla until smooth.
Gently stir in cheerios to coat with syrup.
Drop heaping tablespoons of the mixture unto wax paper laid out on a large flat surface.
Allow to cool at least 10-15 minutes.
Enjoy!

This post was originally published on 11/30/11 @ oneincomefamilyliving.blogspot.com. I wrote, revised, and moved it here.

Monday, June 2, 2014

Marshmallow Fondant Tutorial Using a Stand Mixer

This post contains affiliate links
I am often asked what type of fondant I use and when I reply that I usually make my own, the next question is usually to find out which recipe I use. Well, today I'm going to let you in on that secret. I use this recipe (slightly modified) for my Marshmallow Fondant. I make it in my Kitchen Aid, but you can do it by hand. Do not use a hand mixer.
You'll need: 15 oz. mini marshmallows, 2 T water, 1/2 tsp salt, 2 tsp lemon juice, 2 tsp light corn syrup, 1 tsp vanilla, 1/2 tsp lemon extract, 7 1/2 C (a little over 2lbs) confectioner's sugar, sifted, and Crisco or vegetable shortening (not pictured)
Thoroughly grease a large plastic bowl, wooden spoon, mixing bowl, and kneading tool of stand mixer with Crisco.
Put 15 oz marshmallows and 2 T water into the greased plastic bowl and microwave 2 minutes, stir with the greased wooden spoon at 40 second intervals.
The marshmallows should be completely melted and soupy when it is ready.
Transfer melted marshmallows to Kitchen Aid mixing bowl and immediately add the lemon juice, both extracts, salt, and corn syrup.
If you want a full batch of one color, now is the time to do it. Use gel colors and keep adding until you achieve your desired shade.
Start adding the 7 1/2 cups sifted powdered sugar and knead on 2 (low).
I find it helpful to add some shortening in with the last 1/2 C sugar (this differs from original recipe).
Once it is thoroughly mixed, prep a piece of plastic wrap by greasing it with shortening, grease your hands, and remove fondant from bowl. It will probably be stuck to the sides a bit, so you'll have to really dig at it. Form it into a ball and wrap in plastic wrap. Wrap it in a second piece of plastic wrap and seal in a plastic bag with the air squeezed out.

Allow it to at least sit overnight before using. Easy right?

What will you make with your first batch?

This post was previously published on 6/17/13 @ oneincomefamilyliving.blogspot.com. I wrote it and transferred it here.
Related Posts Plugin for WordPress, Blogger...